資訊專欄INFORMATION COLUMN

本篇文章主要講述的就是JS編寫一個(gè)鼠標(biāo)移入圖片放大效果,不多說廢話,大家一起看看具體內(nèi)容:
目標(biāo)
給圖片添加鼠標(biāo)移動(dòng)放大方法效果,移到哪里放大哪里
先看看效果是不是你想要的,再看代碼
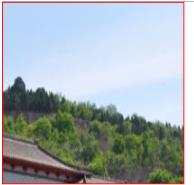
移入前

移入后

html
  <!-- css看著寫 -->
  <div class="Box" style="width:200px;height:200px;border:1px solid #f00;position: relative;top:0;left:0;overflow: hidden;">
  <Img src="../image/lingtai.jpg" alt="" style="width:200px;height:200px;position:absolute;left:0;top:0;">
  </div>
javascript
  // 圖片放大鏡
  // @params Class 目標(biāo)class string
  // @params Scale 放大倍數(shù) number
  function ScaleImg(Class, Scale){
  this.Box = document.querySelector(Class);
  this.Img = this.Box.querySelector('img');
  this.scale = Scale || 3 ;
  // 盒子中心點(diǎn)
  this.BoxX = this.Box.offsetWidth / 2;
  this.BoxY = this.Box.offsetHeight / 2;
  // 獲取盒子初始定位
  this.Left = parseFloat( this.Box.offsetLeft );
  this.Top = parseFloat(this.Box.offsetTop );
  this.Init();
  }
  ScaleImg.prototype = {
  // 鼠標(biāo)移入
  Mouseover: function(e){
  var e = e || window.event;
  // 放大圖片
  this.Img.style.width = this.Img.offsetWidth * this.scale + "px";
  this.Img.style.height = this.Img.offsetHeight * this.scale + "px";
  // 設(shè)置放大后的圖片定位
  this.Img.style.left = (this.Box.offsetWidth - this.Img.offsetWidth) / 2 + "px";
  this.Img.style.top = (this.Box.offsetHeight - this.Img.offsetHeight) / 2 + "px";
  // 獲取圖片放大后定位值
  this.ImgLeft = parseFloat(this.Img.style.left);
  this.ImgTop = parseFloat(this.Img.style.top);
  this.Box.left = (this.Box.offsetWidth - this.Img.offsetWidth) / 2;
  this.Box.top = (this.Box.offsetHeight - this.Img.offsetHeight) / 2;
  // 阻止默認(rèn)事件
  return ;
  },
  // 鼠標(biāo)移除
  Mouseout: function(e){
  var e = e || window.event;
  // 重置css
  this.Img.style.width = this.Img.offsetWidth / this.scale + "px";
  this.Img.style.height =this.Img.offsetHeight / this.scale + "px";
  this.Img.style.left = Math.floor((this.Box.offsetWidth - this.Img.offsetWidth) / 2) + "px";
  this.Img.style.top = Math.floor((this.Box.offsetHeight - this.Img.offsetHeight) / 2) + "px";
  return ;
  },
  // 鼠標(biāo)移動(dòng)
  Mousemove: function(e){
  var e = e || window.event;
  // 圖片鼠標(biāo)位置
  var ImgXY = {"x": this.Left + this.BoxX, "y": this.Top + this.BoxY};
  // 獲取偏移量
  var left = (ImgXY.x - e.clientX ) / this.BoxX * this.ImgLeft ,
  top = (ImgXY.y - e.clientY) / this.BoxY * this.ImgTop ;
  this.Img.style.left = Math.floor(this.Box.left - left) + "px";
  this.Img.style.top = Math.floor(this.Box.top - top) + "px";
  return ;
  },
  // 初始化
  Init: function(e){
  var that = this;
  this.Box.onmouseover = function(e){
  that.Mouseover(e);
  }
  this.Box.onmouseout = function(e){
  that.Mouseout(e);
  }
  this.Box.onmousemove = function(e){
  that.Mousemove(e);
  }
  }
  }
  // 實(shí)例一個(gè)對(duì)象
  new ScaleImg('.Box');
全部?jī)?nèi)容已講述完畢,歡迎大家多多學(xué)習(xí)。
文章版權(quán)歸作者所有,未經(jīng)允許請(qǐng)勿轉(zhuǎn)載,若此文章存在違規(guī)行為,您可以聯(lián)系管理員刪除。
轉(zhuǎn)載請(qǐng)注明本文地址:http://m.specialneedsforspecialkids.com/yun/128140.html
效果如淘寶、京東這些電商購物時(shí),查看圖片的放大效果。 思路: 先把右邊的大圖和左邊小圖里面的方塊隱藏 當(dāng)鼠標(biāo)移入左邊的smallPic,顯示其里面的小方塊和右邊的bigPic 當(dāng)鼠標(biāo)移動(dòng)里面的小方塊,右邊的bigPic顯示圖片對(duì)應(yīng)的位置 小方塊移動(dòng)的范圍在其父級(jí)smallPic的范圍內(nèi) 當(dāng)鼠標(biāo)smallPic后,bigPic和smallPic里面的小方塊隱藏 用到的方法主要由定位、溢出隱藏、事件...
效果如淘寶、京東這些電商購物時(shí),查看圖片的放大效果。 思路: 先把右邊的大圖和左邊小圖里面的方塊隱藏 當(dāng)鼠標(biāo)移入左邊的smallPic,顯示其里面的小方塊和右邊的bigPic 當(dāng)鼠標(biāo)移動(dòng)里面的小方塊,右邊的bigPic顯示圖片對(duì)應(yīng)的位置 小方塊移動(dòng)的范圍在其父級(jí)smallPic的范圍內(nèi) 當(dāng)鼠標(biāo)smallPic后,bigPic和smallPic里面的小方塊隱藏 用到的方法主要由定位、溢出隱藏、事件...
效果如淘寶、京東這些電商購物時(shí),查看圖片的放大效果。 思路: 先把右邊的大圖和左邊小圖里面的方塊隱藏 當(dāng)鼠標(biāo)移入左邊的smallPic,顯示其里面的小方塊和右邊的bigPic 當(dāng)鼠標(biāo)移動(dòng)里面的小方塊,右邊的bigPic顯示圖片對(duì)應(yīng)的位置 小方塊移動(dòng)的范圍在其父級(jí)smallPic的范圍內(nèi) 當(dāng)鼠標(biāo)smallPic后,bigPic和smallPic里面的小方塊隱藏 用到的方法主要由定位、溢出隱藏、事件...
摘要:知乎原文我的博客微信公眾號(hào)這幾天在逛網(wǎng)站的時(shí)候,發(fā)現(xiàn)很多網(wǎng)站都有輪播圖這個(gè)效果,所以我就仿照小米的官網(wǎng)用原生寫了一個(gè)輪播圖效果,希望大家喜歡。 知乎原文 我的博客 微信公眾號(hào)這幾天在逛網(wǎng)站的時(shí)候,發(fā)現(xiàn)很多網(wǎng)站都有輪播圖這個(gè)效果,所以我就仿照小米的官網(wǎng)用原生js寫了一個(gè)輪播圖效果,希望大家喜歡。這是我發(fā)布在github上的最后實(shí)現(xiàn)的效果:https://heternally.gith...
摘要:知乎原文我的博客微信公眾號(hào)這幾天在逛網(wǎng)站的時(shí)候,發(fā)現(xiàn)很多網(wǎng)站都有輪播圖這個(gè)效果,所以我就仿照小米的官網(wǎng)用原生寫了一個(gè)輪播圖效果,希望大家喜歡。 知乎原文 我的博客 微信公眾號(hào)這幾天在逛網(wǎng)站的時(shí)候,發(fā)現(xiàn)很多網(wǎng)站都有輪播圖這個(gè)效果,所以我就仿照小米的官網(wǎng)用原生js寫了一個(gè)輪播圖效果,希望大家喜歡。這是我發(fā)布在github上的最后實(shí)現(xiàn)的效果:https://heternally.gith...
閱讀 561·2023-03-27 18:33
閱讀 750·2023-03-26 17:27
閱讀 647·2023-03-26 17:14
閱讀 603·2023-03-17 21:13
閱讀 537·2023-03-17 08:28
閱讀 1823·2023-02-27 22:32
閱讀 1315·2023-02-27 22:27
閱讀 2199·2023-01-20 08:28